When it comes to creating an epoxy project, whether it is wood, plastic or some other type of material that is being used, it is important to seal the product thoroughly before placing the final layer also known as the flood.
After mixing 2 parts of epoxy risen with 1 part of hardener, place a thin layer of about 1/16″ over the material being used. Be sure you use a brush to get all areas including hard to reach spots. Smooth out the layer once completed to avoid permanent bubbles, then let it sit for at least 4 hours to dry before placing the final flood coat on your project.
Prepare The Material
The first step before applying your epoxy on your material, is to first make sure all the material (wood, plastic, etc) has been been shaped for your design. Next, be sure and sand it to get a smooth feel if needed.
If there is sand dust or any particles, be sure to either vacuum it up completely, or sweep off any excess debris. You do not want any of this to become mixed with your final product.
After you are satisfied with your sculpture or design, you can now proceed to preparing your Epoxy pouring agent.
Use Proper Personal Protective Equipment (PPE)
When preparing your epoxy coat, be sure you have all proper protective equipment on to avoid any accidental injury. You want to avoid getting it one your skin and in your eyes.
- Glasses or goggles are recommended to avoid any possible splashes of liquid toward your eyes. It is important to note that not only are goggles used to help protect your eyes, but the fumes from the epoxy in itself may cause some minor irritation.
- Gloves should be worn while prepping your epoxy. You want to avoid getting any of it on your skin. The epoxy on your skin itself most likely will not cause any significant burning to your skin, however it can cause some irritation. Therefore it is always best to simply avoid skin contact.
Pick The Proper Room Temperature
Before starting your Epoxy mixing and working on your project, be sure you are located in a proper location with adequate temperatures so that it can cure properly.
The best temperature for epoxy to cure is around 75 to 85 degrees. You could say it is best at or just above normal room temperatures. Try to avoid excessive heat or extreme cold temperatures to avoid improper curing of the epoxy.
Preparing Your Epoxy
Now that you have the material ready and proper safety gear on, you will need to use two types of Epoxy’s to get the mix needed for the initial sealant coat onto your project.
- Determine the volume of epoxy necessary for your project. You can do this by measuring the length by the width and dividing them by 2 to determine how much volume will be needed to cover the surface of the project. For the initial sealant phase, you won’t need to worry about the depth too much, since it needs to only be about 1/16″ thick.
- Gather a plastic container that can be used for mixing the epoxy resin and hardener together. Prior to adding any of the chemicals into the container be sure it is completely clean and free of any dust or debris. You want to avoid any small particles that could mix with the Epoxy and forever be displayed on your final project.
- Add 2 part of the epoxy resin to 1 part of the hardener.
- Mix vigorously for at least 2 minutes scraping the bottle of the container and sides with a clean stick. it is important to be sure you mix the epoxy very good for the entire duration of 2 minutes. If it feels it could use a little more of stir, go ahead and mix another minute or 2.
If you find after pouring out your epoxy onto your wood that there was gel left into the bottom of the container, it most likely was not mixed well enough. Next time, make it an extra effort to mix it more thoroughly.
Apply Epoxy Coat
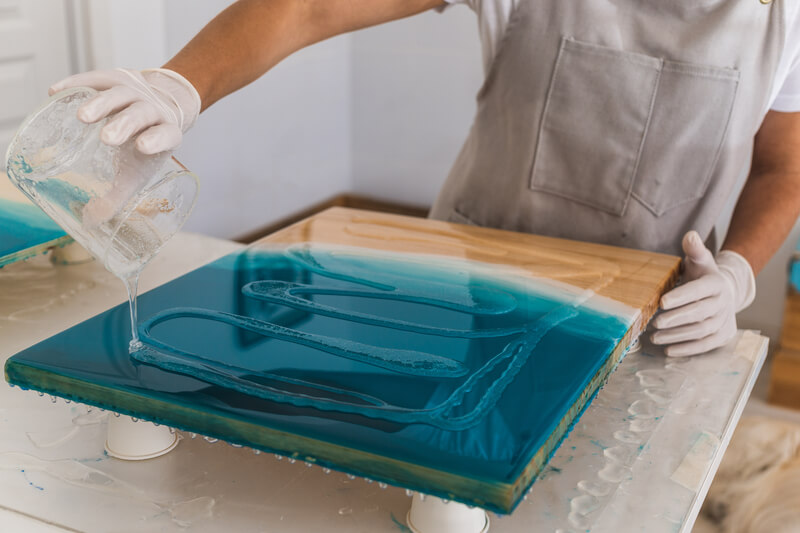
Once you have mixed the resin and hardener together, it is time to apply it to your wood or other material being used. You can gently pour it on the surface and using a brush swipe it up and down until it is completely covered. Be sure you get between any cracks, corners or edges that may contain openings as well.
Once it has been completely covered, use a brush to rub around all sides of the object to get a smooth look and be sure there is no excess liquid on any of the areas.
If there is too much epoxy in a particular area, especially on the sides it can form a line where it runs down the wood. It is not quite as important at this stage of the product, however, since you still have one final coat to add, but keeping it all in good form during the sealing process will make for a much easier final flood coating.
Let It Rest
Once you have placed your first coat of epoxy on the material, let it sit awhile. It is best to let it rest for 4 to 6 hours, and you go ahead and give it a 24 hour curing period until placing the next and final coat on your project.
The sealing processing will allow it to soak in and cure on your project. This is an absolute necessary process when it comes to creating your epoxy creation.